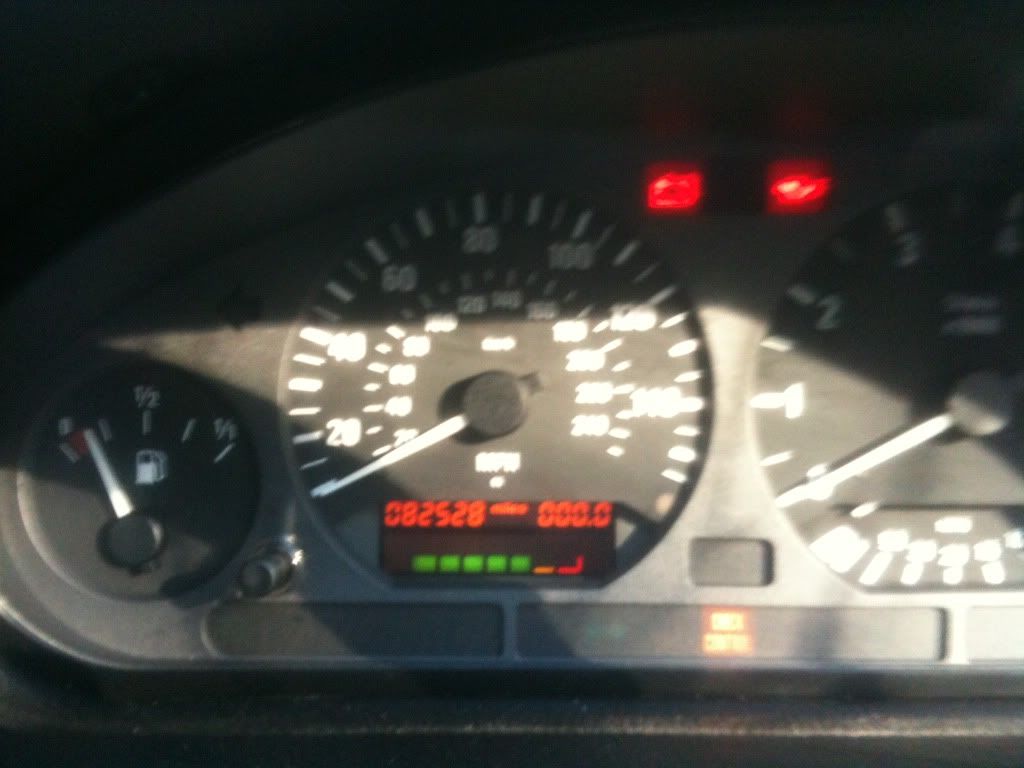

After doing some research on retrofitting obc's, i decided to install one in my 318iS. I read a number of diy's before i started the retrofit, and to be honest a lot of them either contradicted each other or just didnt go into enough detail..
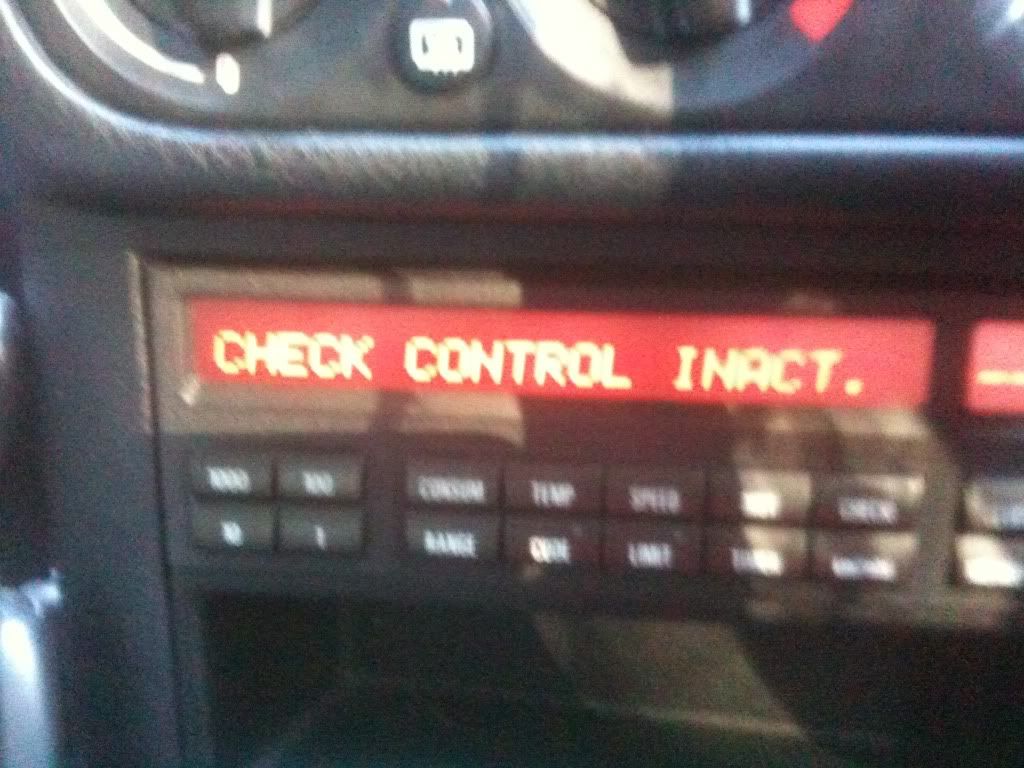
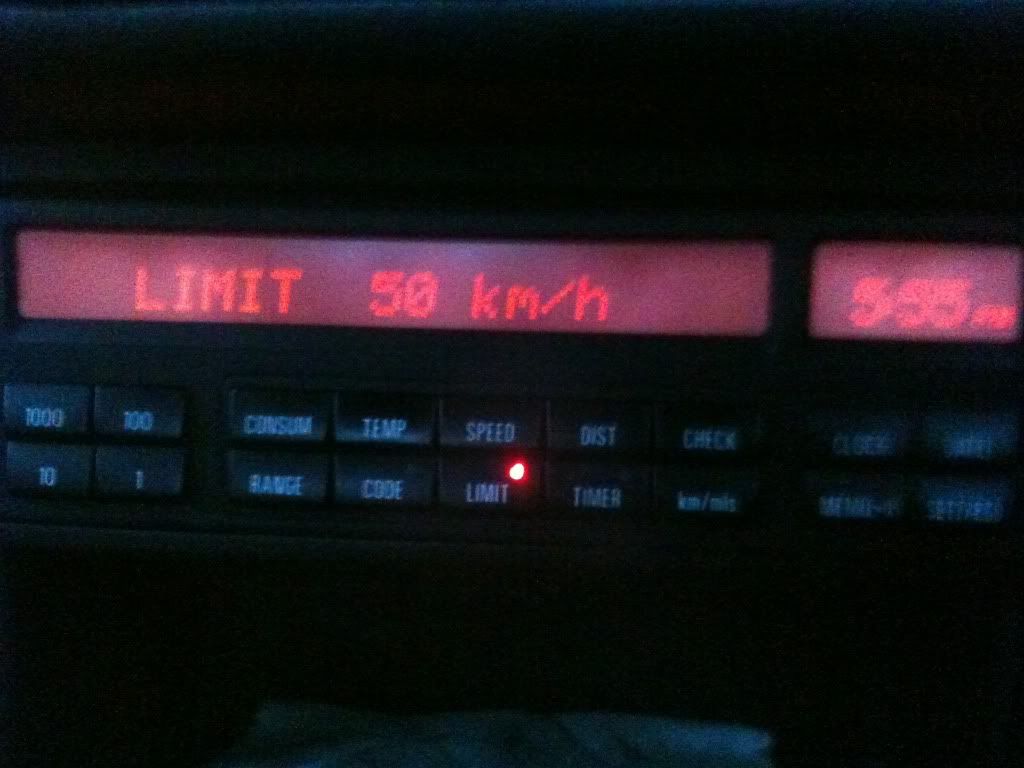
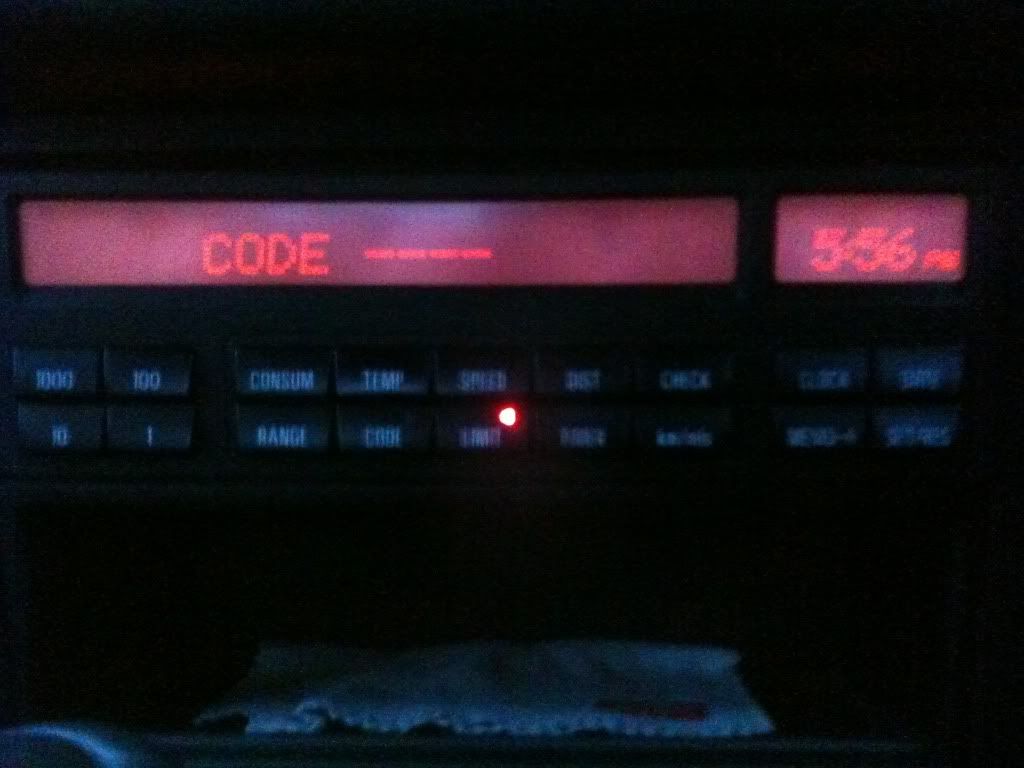
So here is a diy that actually works!! Firstly, i have to state that my car does not have a Check Control Module and that i still need to source a BMW Pin for the CODE function to work. In total, it took me about 6 hours to complete and i went over each connection about 4 times just to be sure
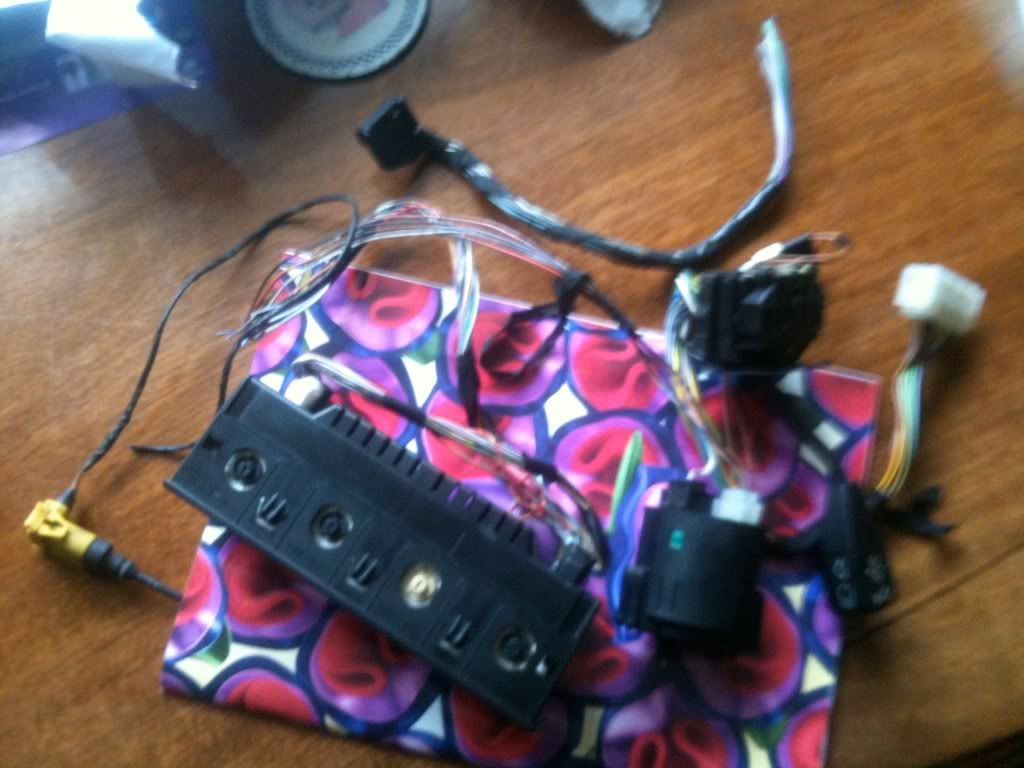
As i wanted to use most of the features, i decided to purchase a kit off another bmw forum. The kit included:
1. 18 Button OBC with black and white harnesses
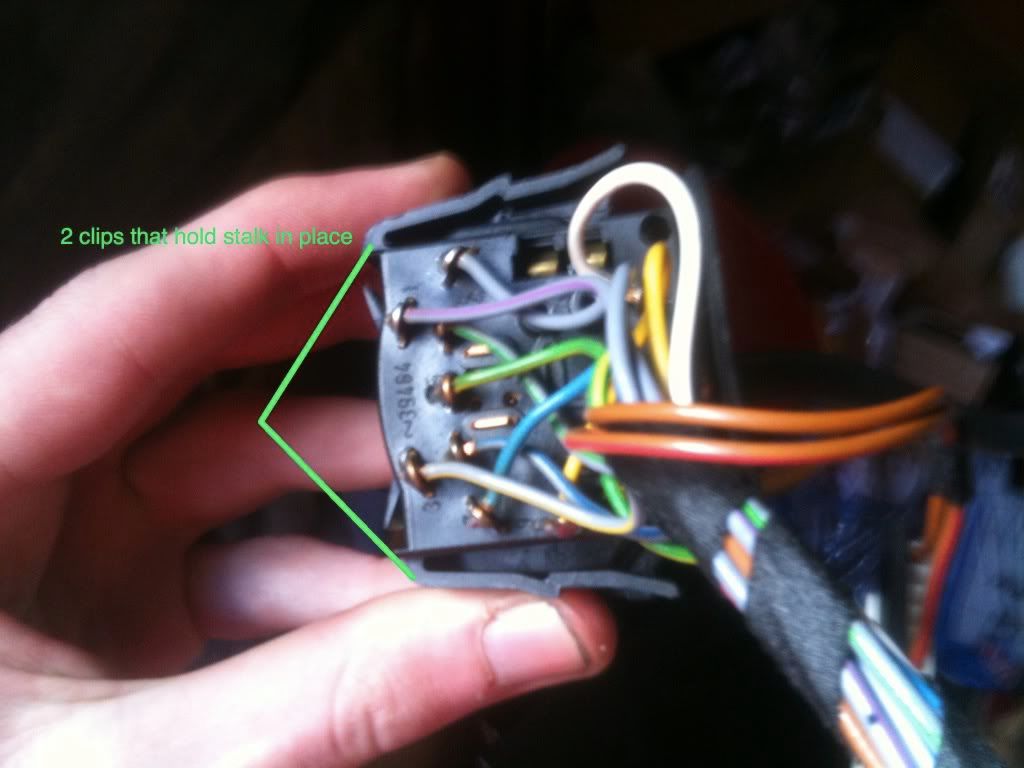
2. OBC Stalk
3. External Temperature Sensor
4. Gong/Chime
5. An extra black harness also came with the kit. This allowed me to extract the pins from the harness and connect them to the blue and white plugs located behind the instrument cluster. I also purchased pins from Maplin but they were too small for the job. If you dont want to solder anything, i suggest go to a breakers and cut the white and blue plugs off the donar car and extract pins from them.
The Kit:
![Image]()
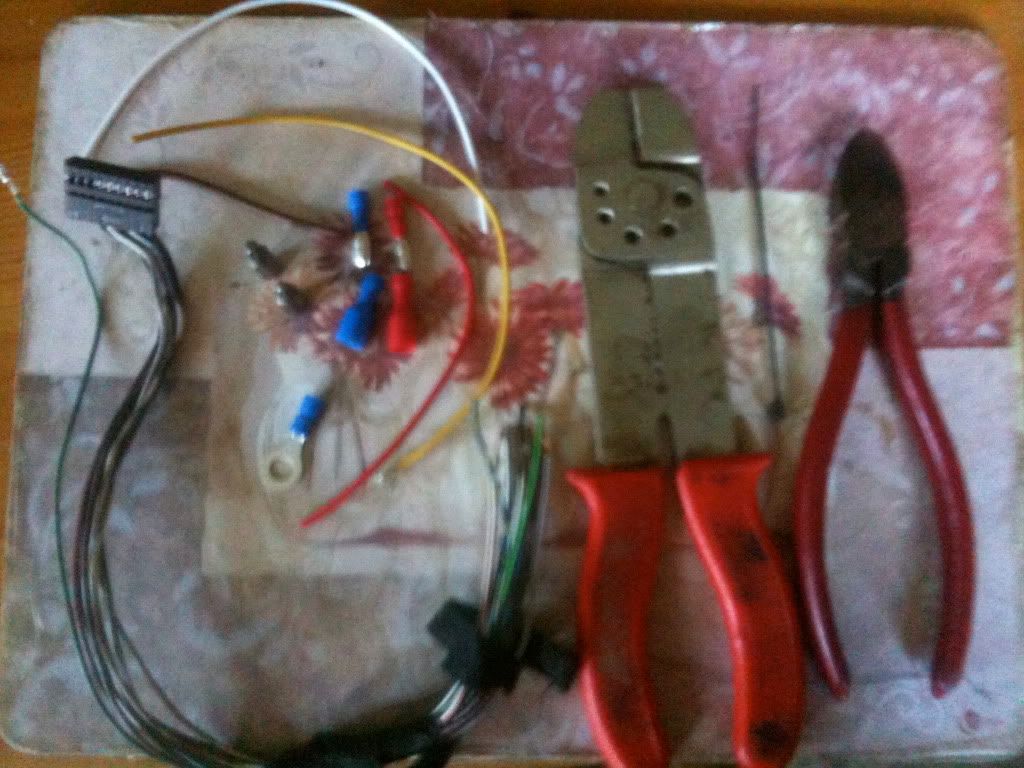
Tools required for the job:
1. 25-30m of assorted equipment wire
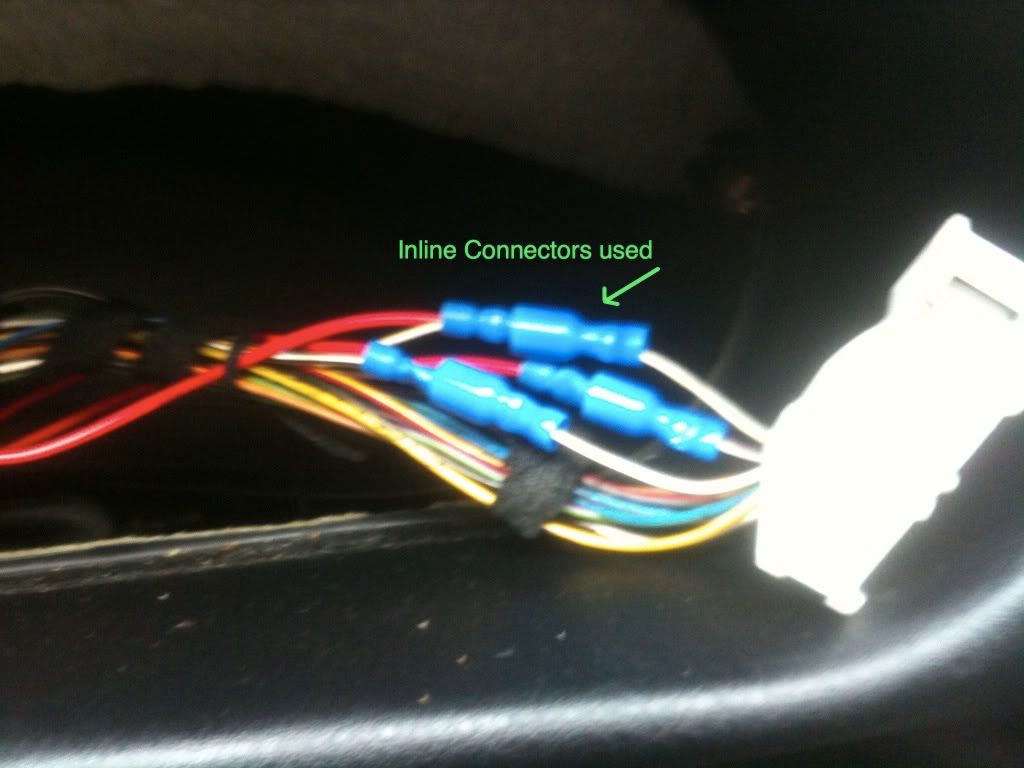
2. In-line connectors both small and medium sizes (other diy's use block connectors but the inline's are less bulky)
3. 1* Ring Connector (for temp sensor)
3. Crimp tool
4. Pliers
5. Various torx heads
6. Philips & flathead screwdrivers
7. Soldering Iron & Solder (if required)
8. Cable Ties
9. Insulation Tape
10.Pins (either from an electrical store or from bmw plugs as explained above)
Tools:
![Image]()
Some terms that are used:
a) X1070 (Black Harness supplied with OBC)
b) X1071 (White Harness supplied with OBC)
c) X16 (White Plug behind Instrument Cluster)
d) X17 (Blue Plug Behind Instrument Cluster)
Getting Started
1. Disconnect Battery
2. Remove glovebox and panel underneath.
3. Remove analogue clock (use a small screwdriver and it just clips out)
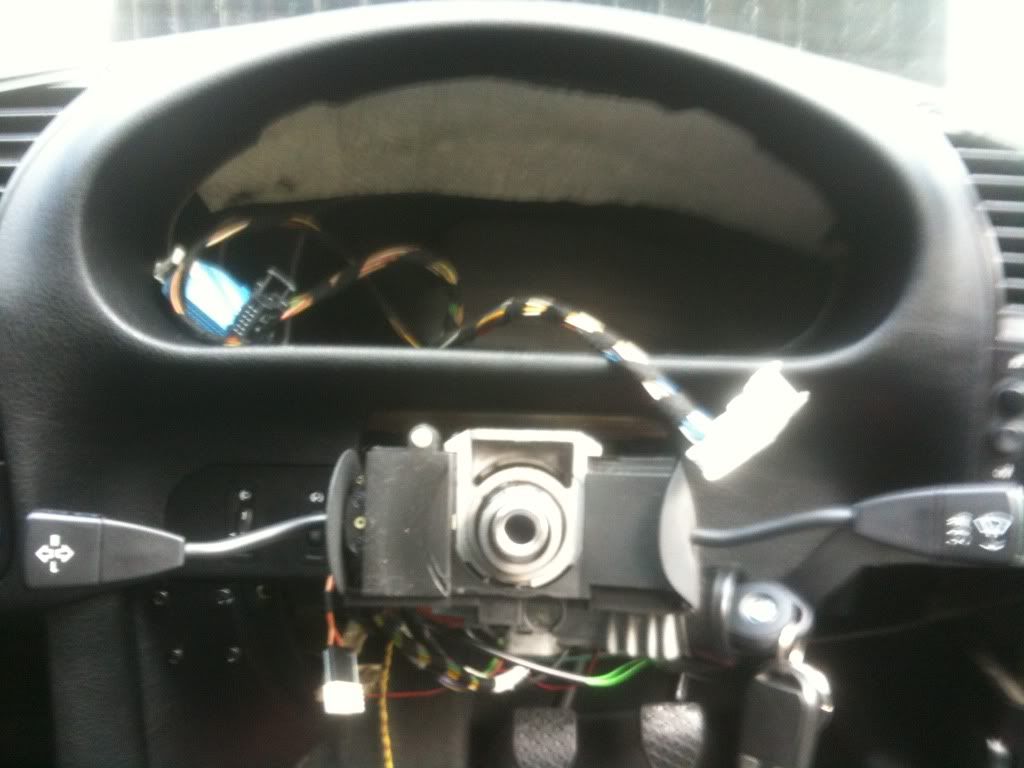
4. Remove airbag, steering wheel, panel underneath, and steering column trim.
Note, if you have an adjustable steering wheel, you don't need to remove airbag or wheel-just adjust it to its lowest position.
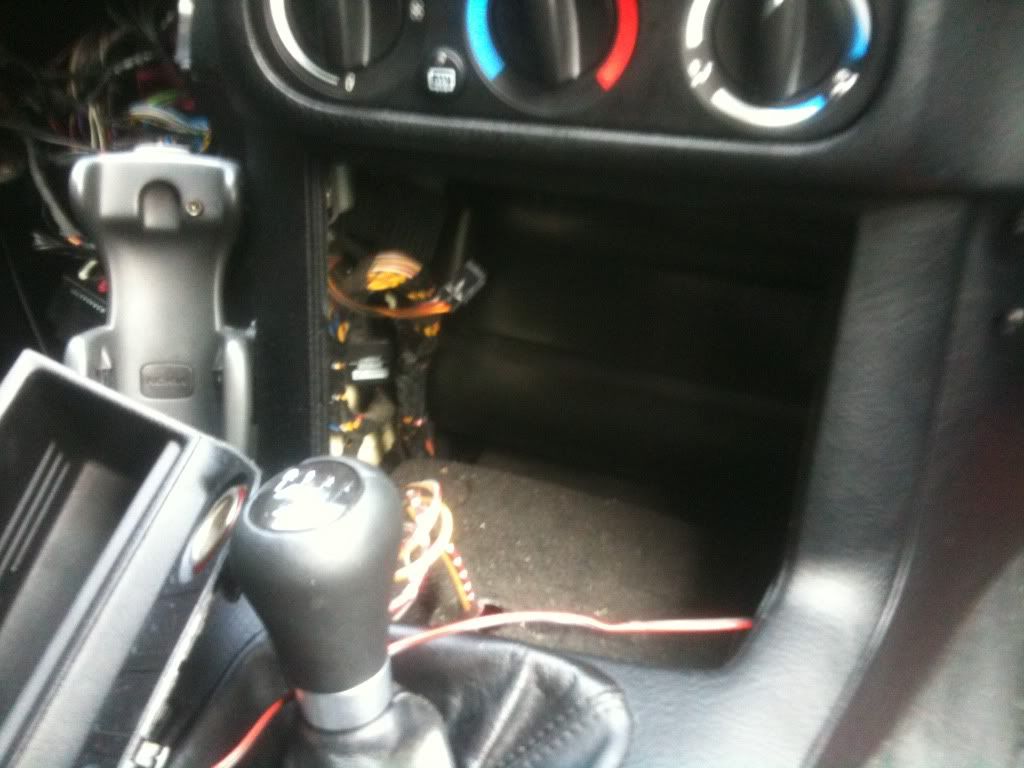
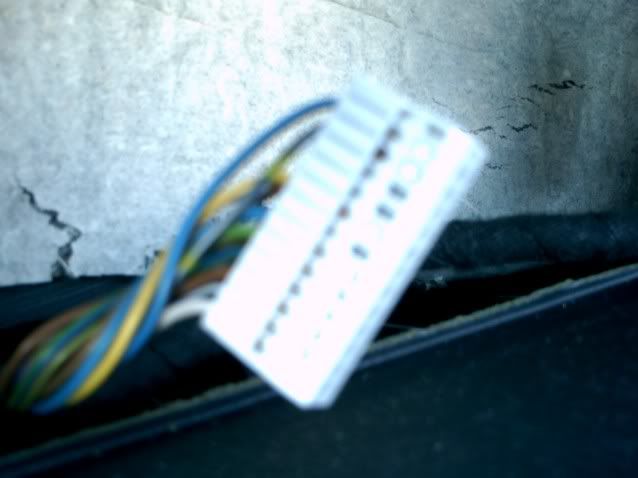
5. Remove instrument cluster (use a torx head) and disconnect the black, blue and white plugs from behind the cluster.
This is what awaits you
![Image]()
![Image]()
![Image]()
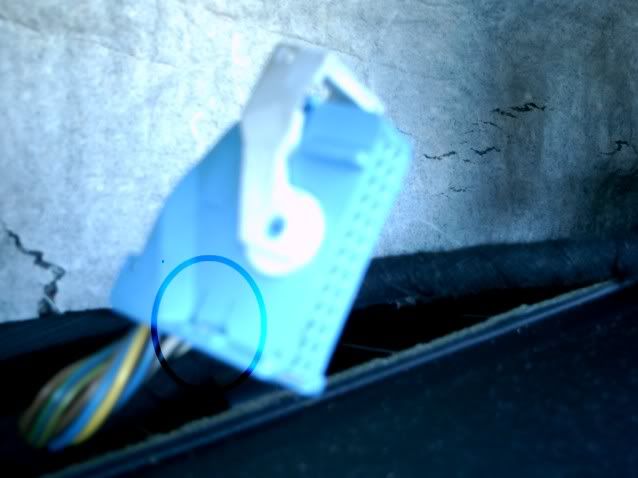
As some wires are missing from X16 & X17, it is necessary to remove the body of the plugs. This is achieved by pulling on the tab highlighted in the pic below:
![Image]()
body removed
![Image]()
I also removed the covers on the black and white harnesses to ensure that connections were correct.
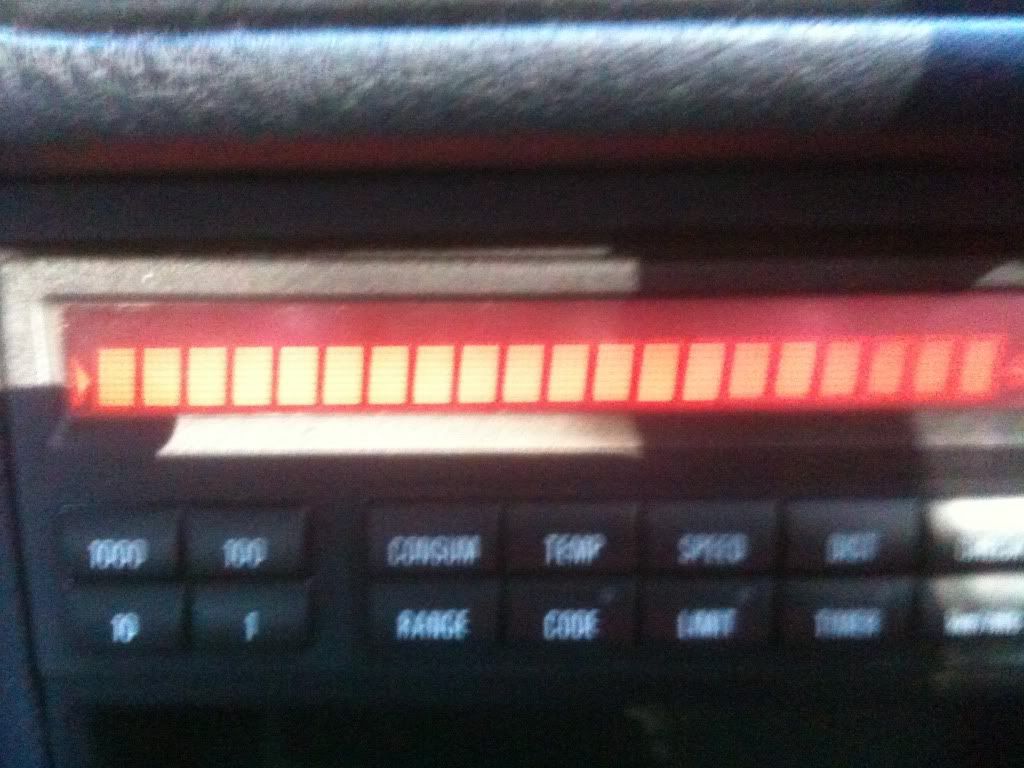
Next comes the checklist as follows:
Black Harness (X1070):
Pin 1: Not Relevant
Pin 2: Not Relevant
Pin 3: Not Relevant
Pin 4: Not Relevant
Pin 5: Not Relevant
Pin 6: (blue/brown/yellow) Goes to ----------------------> Pin 26 of X17
Pin 7: Not Relevant
Pin 8: Not Relevant
Pin 9: (green/blue) Goes to ----------------------> Pin 4 of X17
Pin 10: (blue/white) Goes to ----------------------> Gong (blue/white)
Pin 11: (red/white) Goes to ----------------------> Gong (red/white)
Pin 12: (brown/grey) Goes to ----------------------> Temp Sensor
Pin 13: (black/white) Goes to ----------------------> Pin 2 of X17
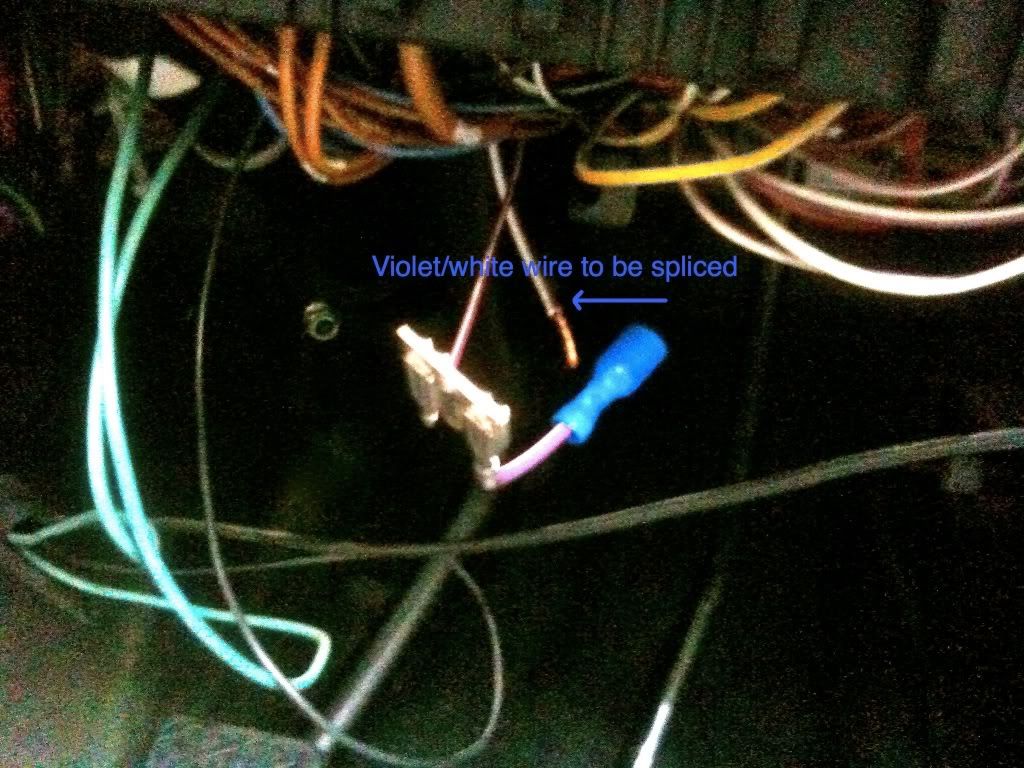
Pin 14: (violet/white) Goes to ----------------------> violet white wire under steering wheel (pic included later)
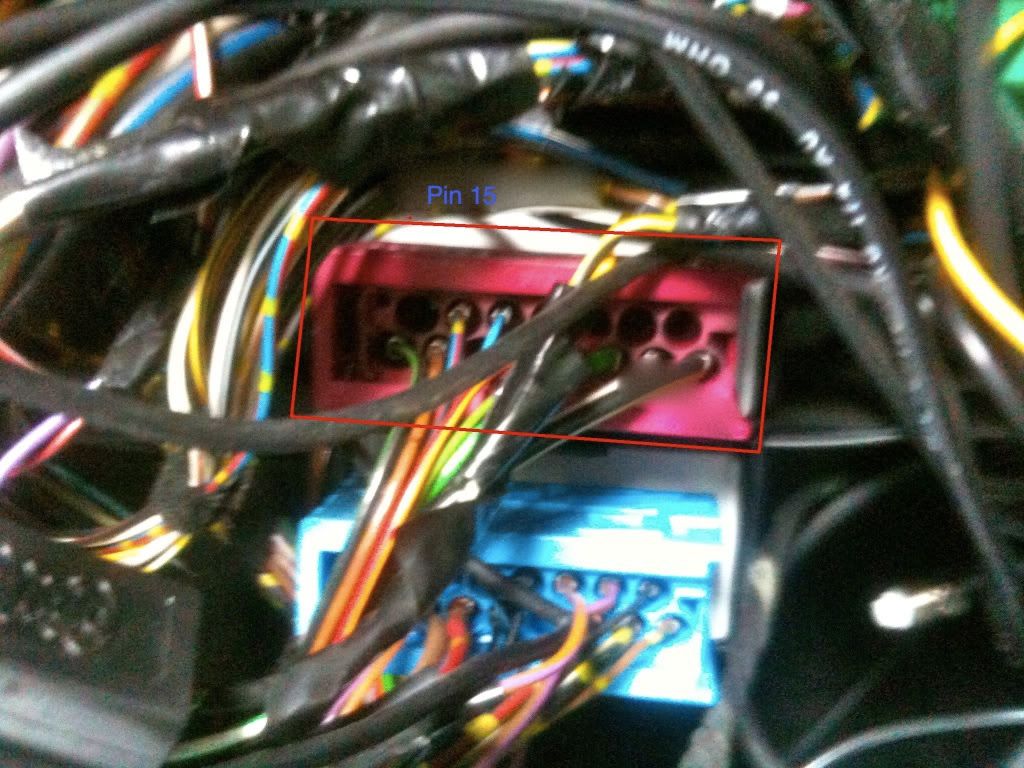
Pin 15: (blue/violet/white) Goes to ----------------------> Pin 24 of X17
Pin 16: (grey/red) Goes to ----------------------> Old clock (also grey/red)
Pin 17: (brown) Goes to ----------------------> Old Clock (also brown)
Pin 18: (red/yellow) Goes to ----------------------> Old Clock (also red/yellow)
White Harness (X1071):
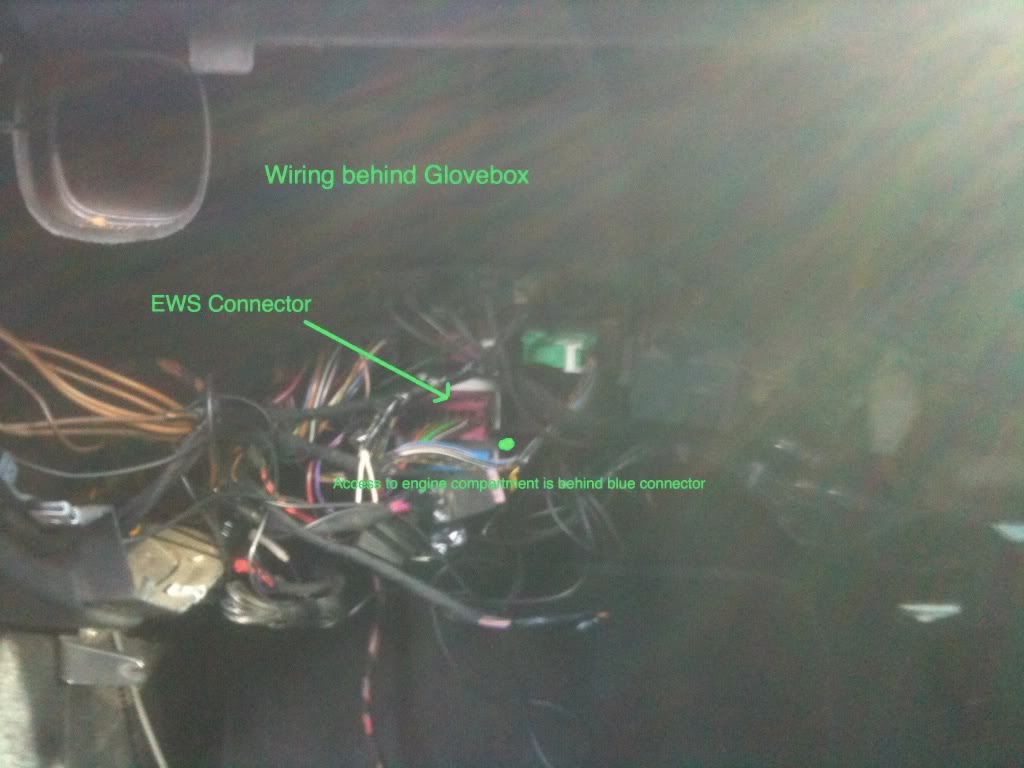
Pin 1: (black/green) Goes to ----------------------> Pin 15 of EWS Unit
Pin 2: (purple/green) Not Relevant
Pin 3: (black/blue) Not Relevant
Pin 4: (brown/red) Goes to ----------------------> OBC Stalk (yellow/red wire)
Pin 5: (white/violet) Goes to ----------------------> Pin 12 of X16
Pin 6: (white/black) Goes to ----------------------> Pin 21 of X16
Pin 7: (white/yellow) Goes to ----------------------> Pin 11 of X16
Pin 8: (red/yellow) Goes to ----------------------> Pin 18 of X1070
Pin 9: (white/grey) Goes to ----------------------> Pin 10 of X17
Pin 10: Not Relevant
Pin 11: Not Relevant
Pin 12: Not Relevant
Pin 13: (brown) Goes to ----------------------> Pin 17 of X1070
Pin 14: Not Relevant
Pin 15: Not Relevant
Pin 16: Not Relevant
Pin 17: Not Relevant
Pin 18: Not Relevant
So here is a diy that actually works!!
Firstly, i have to state that my car does not have a Check Control Module and that i still need to source a BMW Pin for the CODE function to work. In total, it took me about 6 hours to complete and i went over each connection about 4 times just to be sure As i wanted to use most of the features, i decided to purchase a kit off another bmw forum. The kit included:
1. 18 Button OBC with black and white harnesses
2. OBC Stalk
3. External Temperature Sensor
4. Gong/Chime
5. An extra black harness also came with the kit. This allowed me to extract the pins from the harness and connect them to the blue and white plugs located behind the instrument cluster. I also purchased pins from Maplin but they were too small for the job. If you dont want to solder anything, i suggest go to a breakers and cut the white and blue plugs off the donar car and extract pins from them.
The Kit:
Tools required for the job:
1. 25-30m of assorted equipment wire
2. In-line connectors both small and medium sizes (other diy's use block connectors but the inline's are less bulky)
3. 1* Ring Connector (for temp sensor)
3. Crimp tool
4. Pliers
5. Various torx heads
6. Philips & flathead screwdrivers
7. Soldering Iron & Solder (if required)
8. Cable Ties
9. Insulation Tape
10.Pins (either from an electrical store or from bmw plugs as explained above)
Tools:
Some terms that are used:
a) X1070 (Black Harness supplied with OBC)
b) X1071 (White Harness supplied with OBC)
c) X16 (White Plug behind Instrument Cluster)
d) X17 (Blue Plug Behind Instrument Cluster)
Getting Started
1. Disconnect Battery
2. Remove glovebox and panel underneath.
3. Remove analogue clock (use a small screwdriver and it just clips out)
4. Remove airbag, steering wheel, panel underneath, and steering column trim.
Note, if you have an adjustable steering wheel, you don't need to remove airbag or wheel-just adjust it to its lowest position.
5. Remove instrument cluster (use a torx head) and disconnect the black, blue and white plugs from behind the cluster.
This is what awaits you
As some wires are missing from X16 & X17, it is necessary to remove the body of the plugs. This is achieved by pulling on the tab highlighted in the pic below:
body removed
I also removed the covers on the black and white harnesses to ensure that connections were correct.
Next comes the checklist as follows:
Black Harness (X1070):
Pin 1: Not Relevant
Pin 2: Not Relevant
Pin 3: Not Relevant
Pin 4: Not Relevant
Pin 5: Not Relevant
Pin 6: (blue/brown/yellow) Goes to ----------------------> Pin 26 of X17
Pin 7: Not Relevant
Pin 8: Not Relevant
Pin 9: (green/blue) Goes to ----------------------> Pin 4 of X17
Pin 10: (blue/white) Goes to ----------------------> Gong (blue/white)
Pin 11: (red/white) Goes to ----------------------> Gong (red/white)
Pin 12: (brown/grey) Goes to ----------------------> Temp Sensor
Pin 13: (black/white) Goes to ----------------------> Pin 2 of X17
Pin 14: (violet/white) Goes to ----------------------> violet white wire under steering wheel (pic included later)
Pin 15: (blue/violet/white) Goes to ----------------------> Pin 24 of X17
Pin 16: (grey/red) Goes to ----------------------> Old clock (also grey/red)
Pin 17: (brown) Goes to ----------------------> Old Clock (also brown)
Pin 18: (red/yellow) Goes to ----------------------> Old Clock (also red/yellow)
White Harness (X1071):
Pin 1: (black/green) Goes to ----------------------> Pin 15 of EWS Unit
Pin 2: (purple/green) Not Relevant
Pin 3: (black/blue) Not Relevant
Pin 4: (brown/red) Goes to ----------------------> OBC Stalk (yellow/red wire)
Pin 5: (white/violet) Goes to ----------------------> Pin 12 of X16
Pin 6: (white/black) Goes to ----------------------> Pin 21 of X16
Pin 7: (white/yellow) Goes to ----------------------> Pin 11 of X16
Pin 8: (red/yellow) Goes to ----------------------> Pin 18 of X1070
Pin 9: (white/grey) Goes to ----------------------> Pin 10 of X17
Pin 10: Not Relevant
Pin 11: Not Relevant
Pin 12: Not Relevant
Pin 13: (brown) Goes to ----------------------> Pin 17 of X1070
Pin 14: Not Relevant
Pin 15: Not Relevant
Pin 16: Not Relevant
Pin 17: Not Relevant
Pin 18: Not Relevant