

I have seen a few e46 clusters with chrome rings and decided to do the same as I find BMW got real lazy on the cluster design. So below is a cluster I modified costing a total of €40.
WARNING!!! THE CLUSTER HOLDS THE CAR MILEAGE. DO NOT PUT THE KEY INTO YOUR CAR WITHOUT THE CLUSTER INSTALLED AS YOU WILL GET A TAMPER DOT. IF YOU WISH TO TEST THE CLUSTER INSTALL IT AND TURN ON THE LIGHTS. DO NOT PUT THE KEY INTO THE IGNITION!!!
Before we start, take a picture of your cluster with the car off. You will need this to reposition the needles when we are finished.
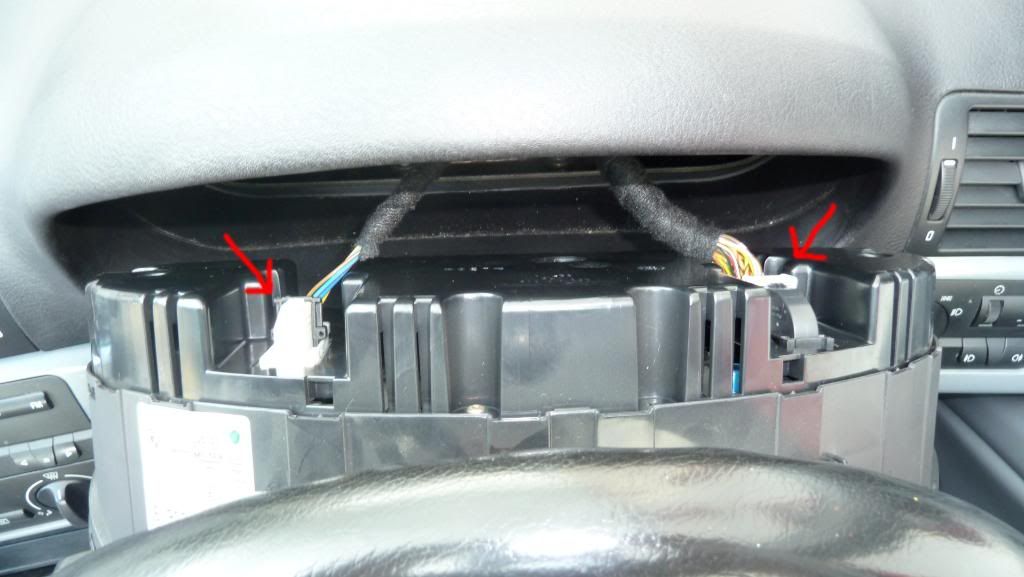
Step 1: To remove the cluster you have to remove these too torque screws.
![Image]()
Remove these two connectors onto the back of the cluster. You do not have to remove the steering wheel.
![Image]()
Step 2: There are 4 torque screws behind the cluster. Remove these and pull off the back section
![Image]()
This is what the back of a petrol cluster looks like
![Image]()
Step 3: To remove the dials first you need to take off the clock and mileage buttons. Just take the rubber from the front of the cluster and pull off like below
![Image]()
Take the Dials out and this is what you get
![Image]()
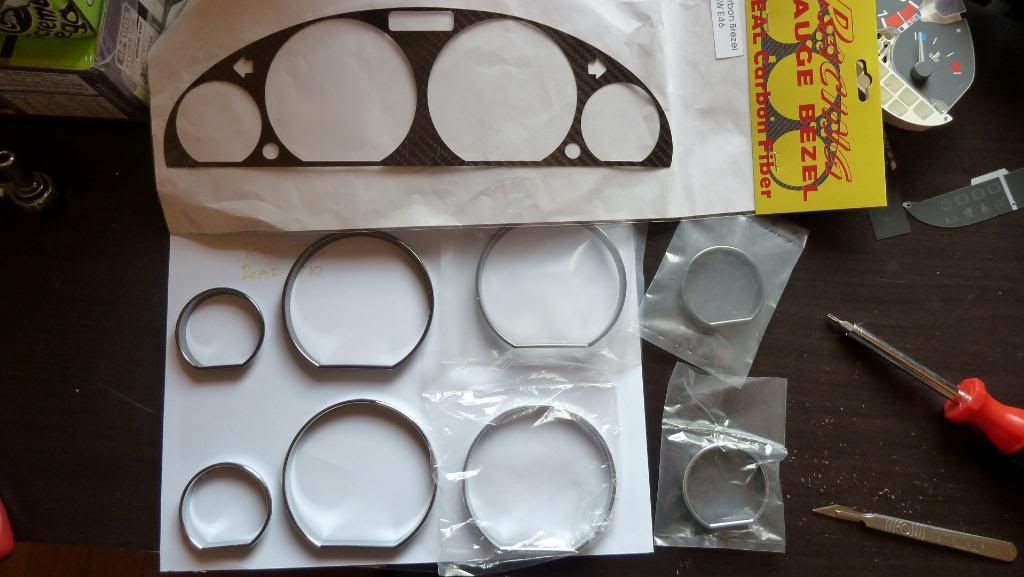
Step 4: I got a set of bright chrome ring, dark chrome rings and a real carbon fibre fascia from ebay.
![Image]()
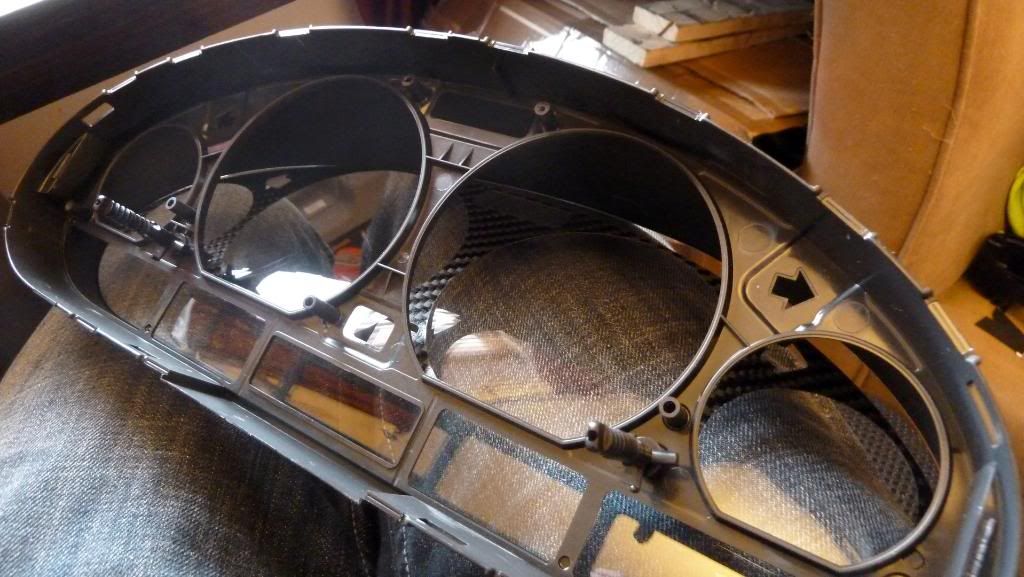
First bend the carbon fibre into place, insert the two mileage and clock button so as the line up the carbon fibre, remove the rear sticker and put into place.
![Image]()
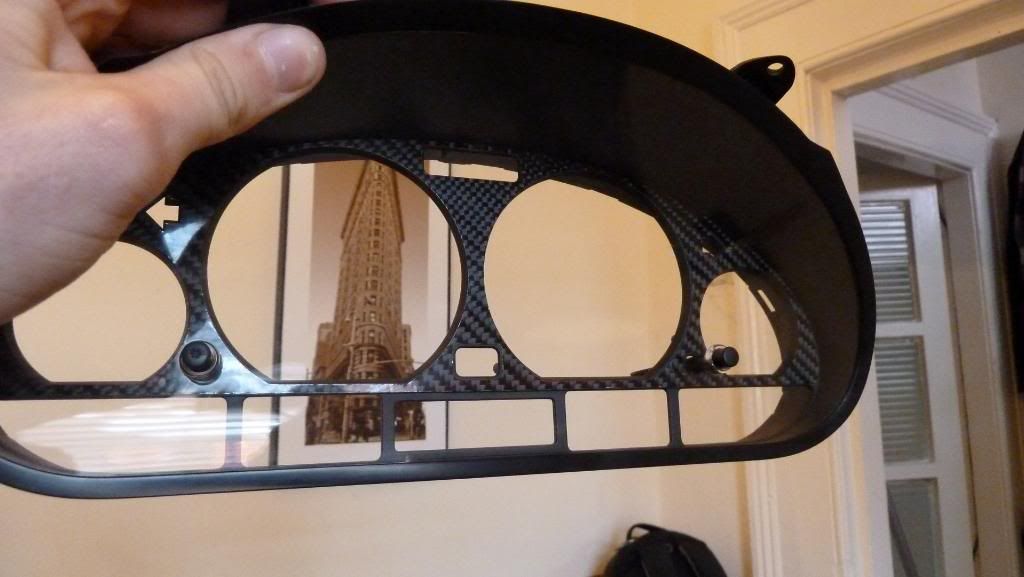
I used the darker chrome rings as they look much better with the carbon fibre
![Image]()
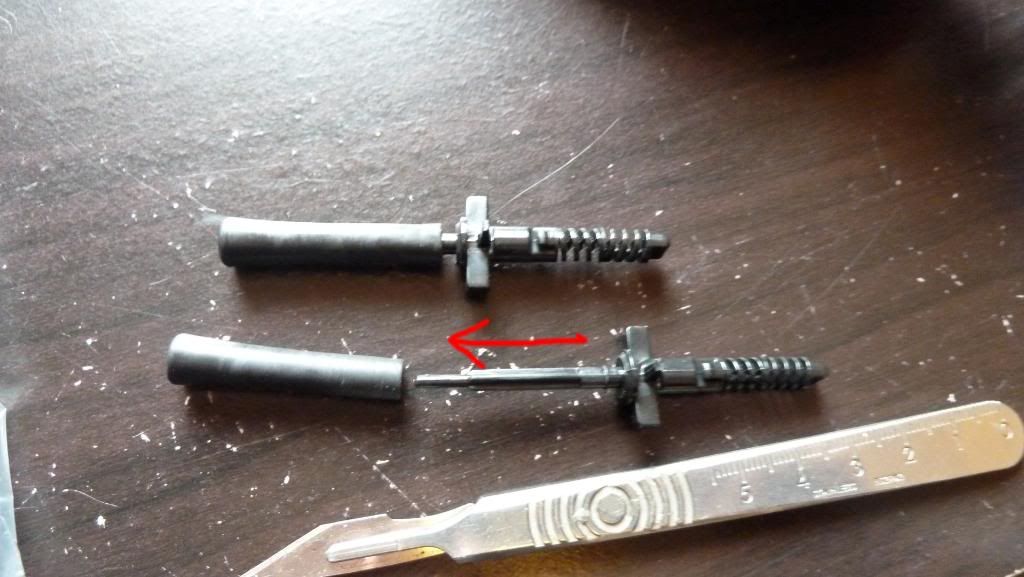
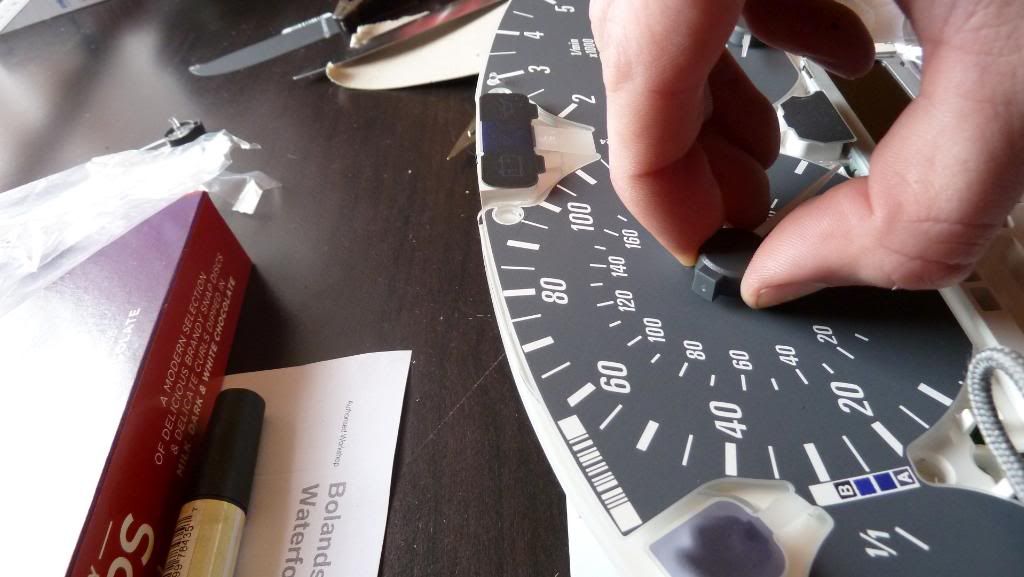
Step 5: This is the painful bit, removing the dials. It is VERY IMPORTANT to take your time here. PINCH the needless like in the picture below and TWIST AGAINST THE MOTOR while lightly pulling.
![Image]()
DO NOT TRY TO PRY THEM OFF LIKE THIS
![Image]()
If you can not get a needle off the best thing to do is the get a fork and slowly lift off the needle.
Step 6: I didnt like the needles been white. I tried to paint them red but you could clearly see the brush strokes. I then used nail polish to remove the paint but this also removed the white paint on the rear of the needle white is very very very important as this helps the light travel to the top of the needle. Also the nail polish made the needles go hazy so again the light would not travel to the top of the needle.
The best way to get the dials red is the use a Sharpie marker as it puts a strong but light coat over the surface.
I also dislike the grey centres so I taped up the needle and sprayed the grey a Satin Black.
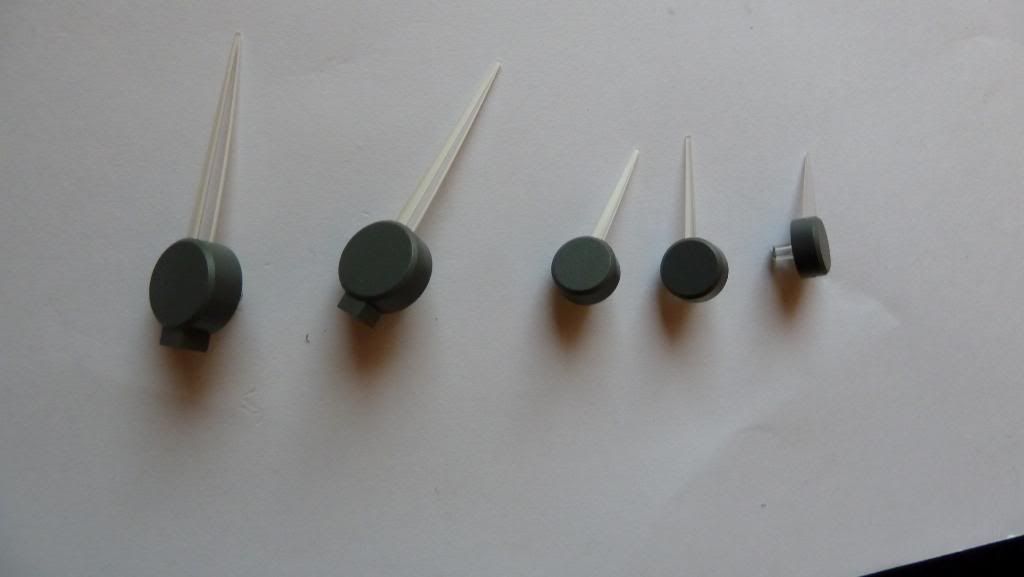
Before:
![Image]()
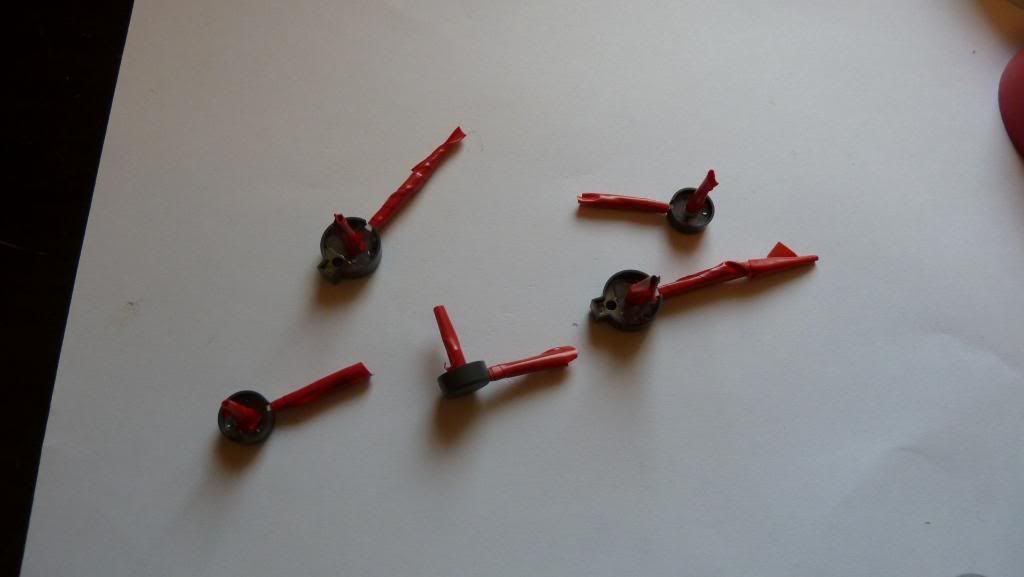
Taped up for painting:
![Image]()
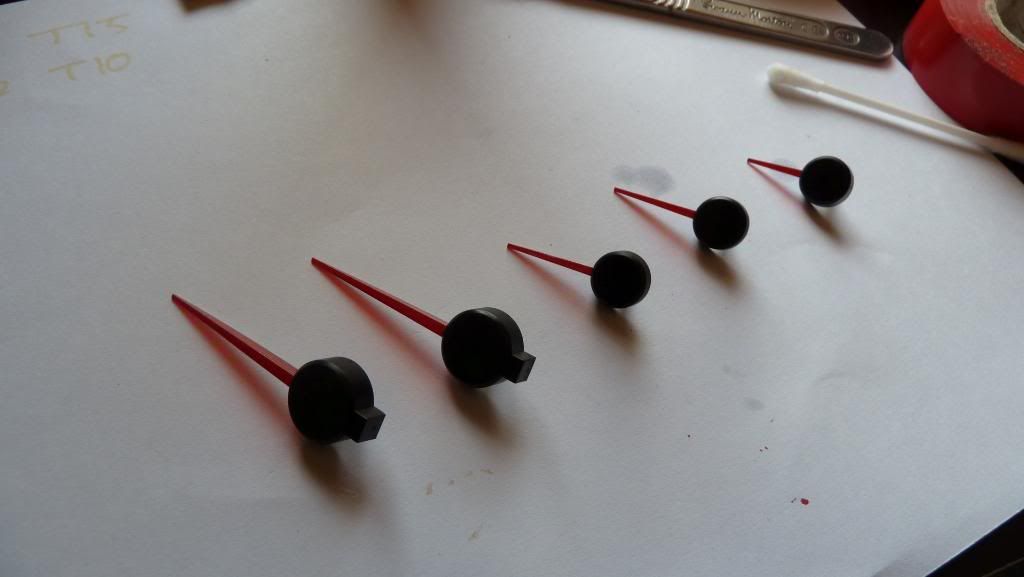
After:
![Image]()
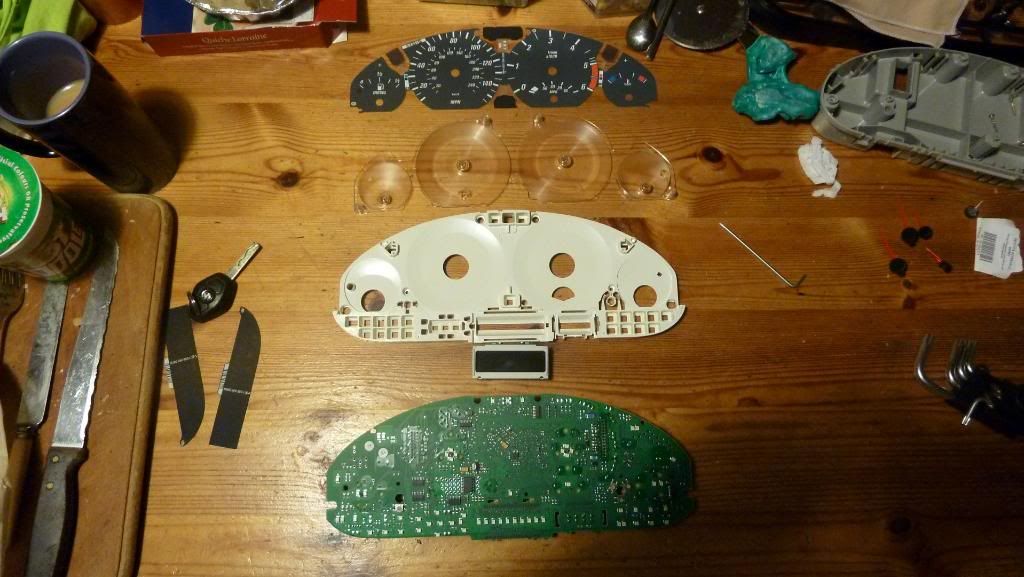
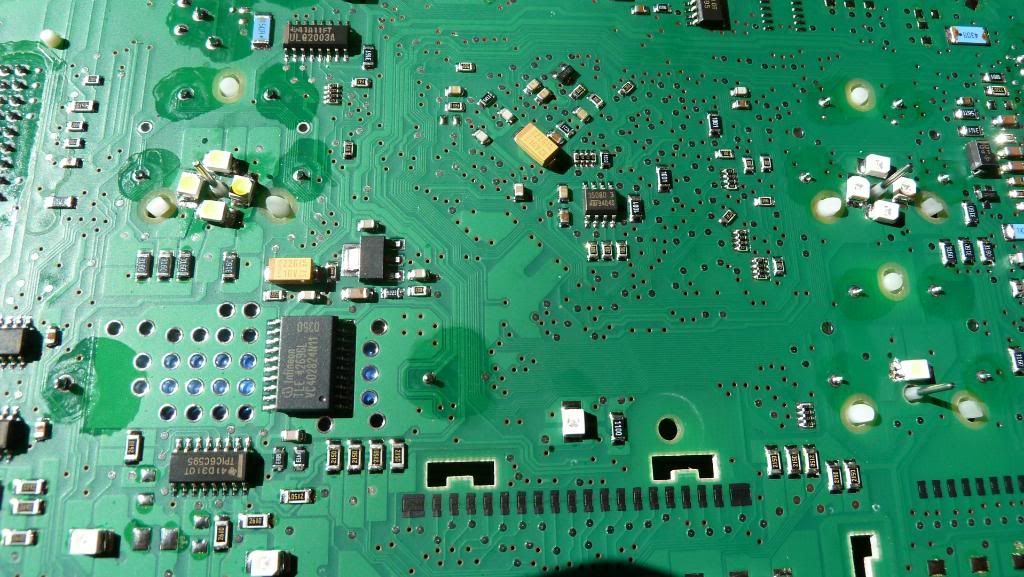
Step 7: Take the dials apart is very easy. The layers you see below simply lift off. However the GLASS display is clipped into the board from behind so carefully remove
![Image]()
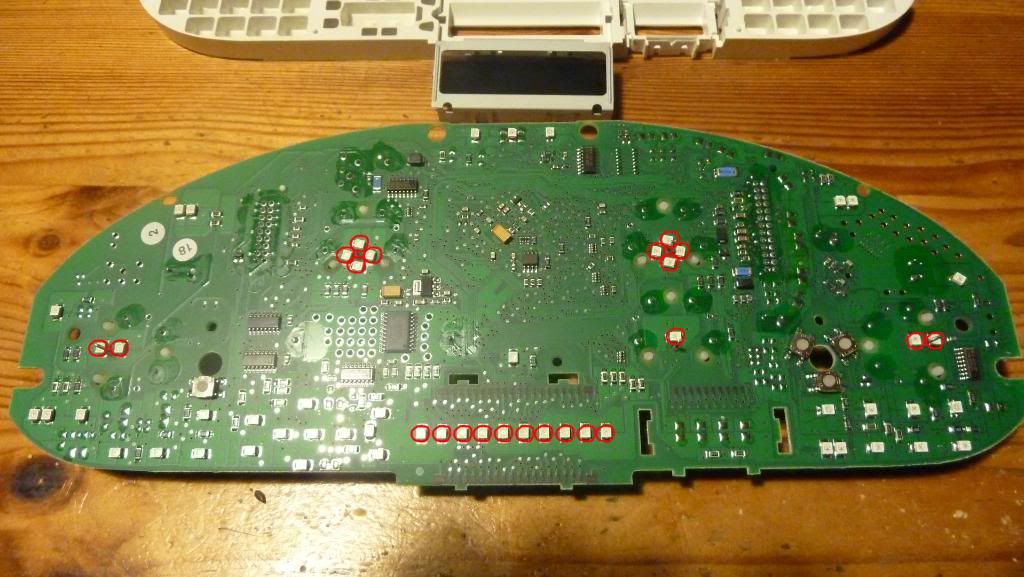
Step 8: Which LED's to replace. I have circles in red the LED's I replaced. I got from ebay some ultra bright white LED's. They were 50c each but look good quality.
I used this white the replace the Amber LED's that were beside the dials.
The line of 10 or so LED's at the bottom I replaced with red. These are used to light up the LCD display.
![Image]()
Below is a picture of the new white LED's (which have a yellow face) on the left and the standard Amber LED's on the right.
![Image]()
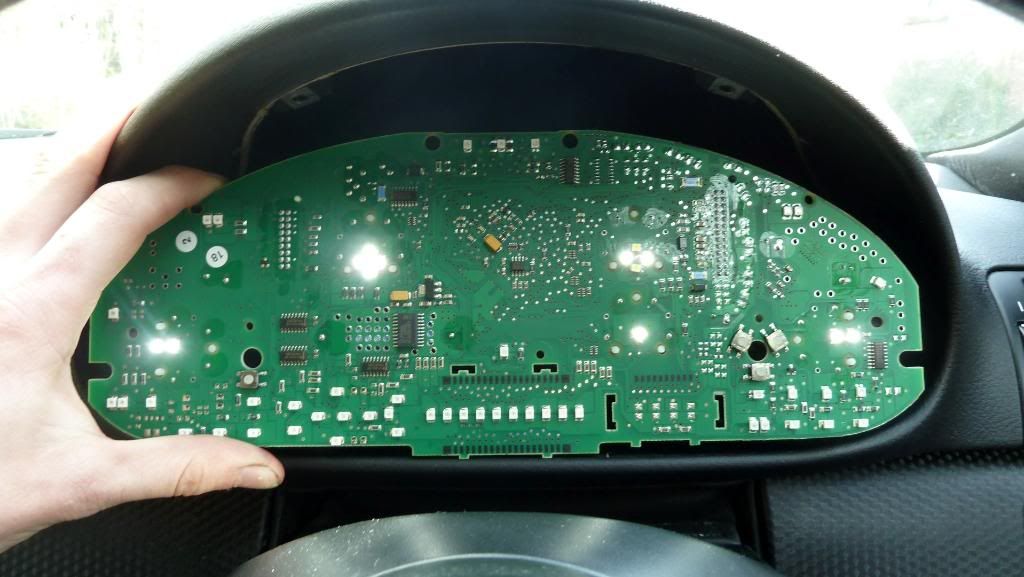
I put the board back into the car and turned on the lights to see if the LED's were all working. As you can see 2 LED's on the revv dial are not working. This is because I installed them the wrong way round.
![Image]()
LED's have a positive and negative. This is defined by a triangle(Positive) at the corner of the LED. Before you removed the old LED's, use a marker to indicate where the positive on the cluster board.
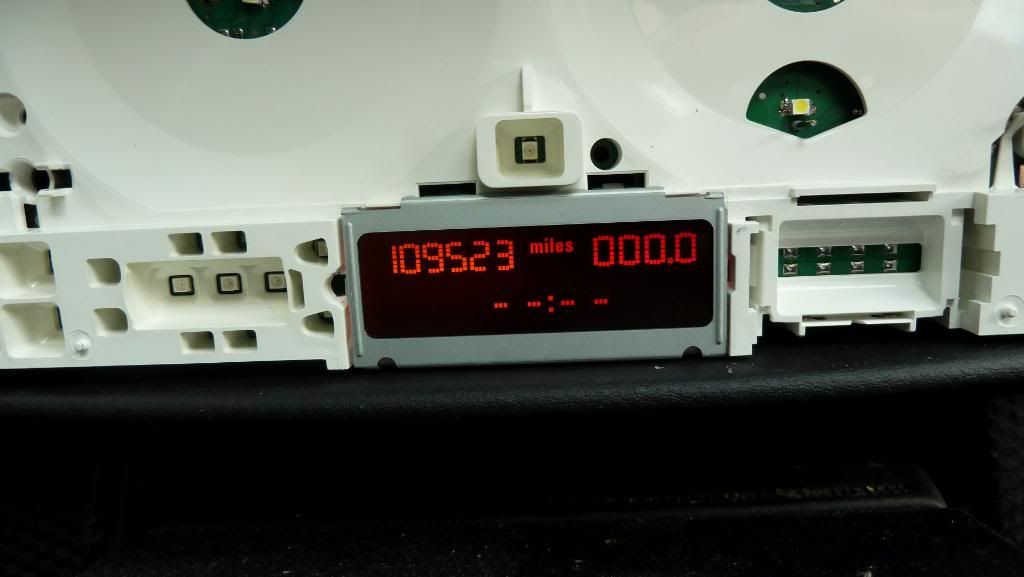
I also replaced the LCD LED's. The picture below has the red LED's on the right and older amber on the left.
![Image]()
I liked the red LED's so much better so replaced the remaining 5.
Step 9: To put the cluster back together it is the reverse. A few things you will need to keep in mind are:
1-Do not push the needles on too hard. If you do the motor will not move them. So you will be driving 155mph down the road but your cluster will say 0 But dont have them too loose as the light will bleed out and look bad.
2-Remember we took a picture of the cluster at the start? Take it out and twist the needles into place so you can feel the motor push (ie if the revv needle is meant to be at 0 then twist it all the way clockwise to 6 O'clock, then go anti-clockwise till you feel pressure against the needle. Once the needle is at 0 STOP). It does not matter if the needle go a little clockwise as once you reconnect the cluster the needles will automatically go to the down position where you set them.
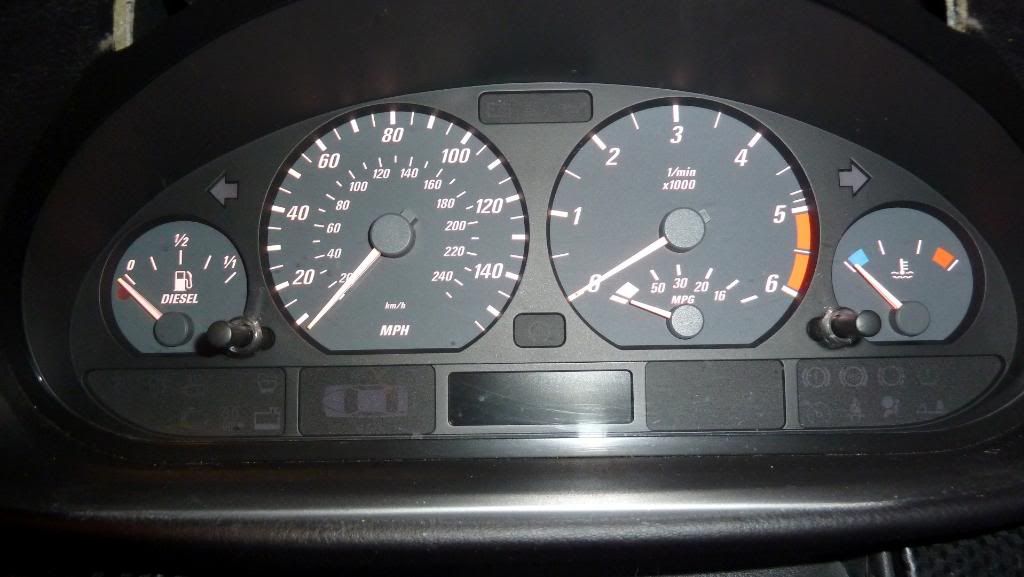
Here are a few before and after photos. You can make up your own mind but I think it is 200times better
Before:
![Image]()
![Image]()
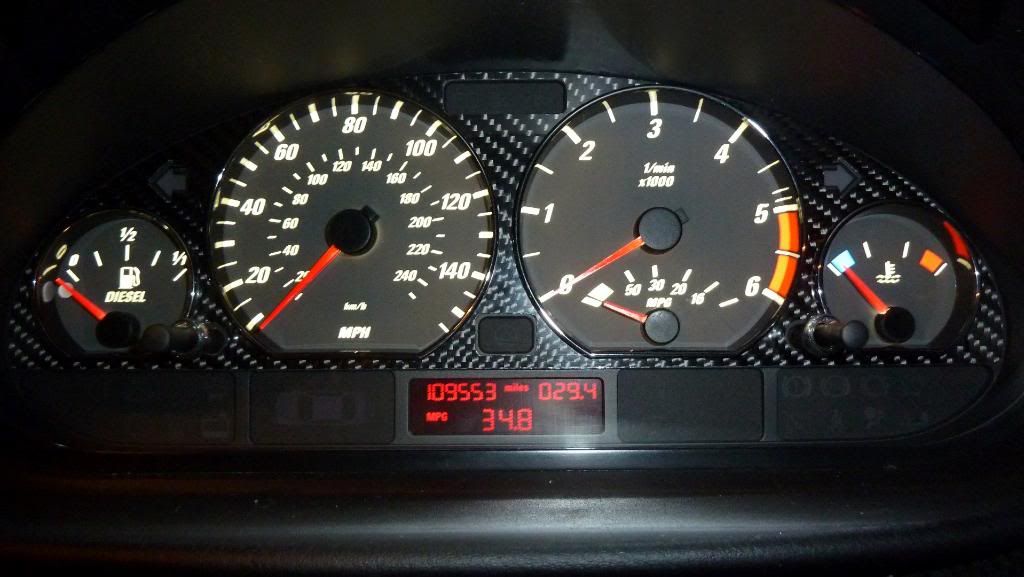
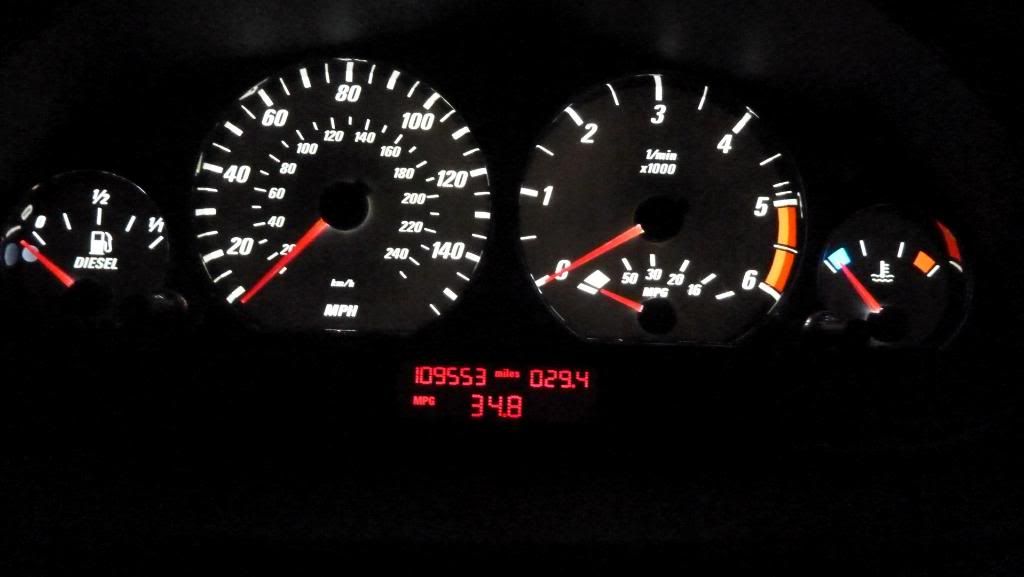
After:
![Image]()
![Image]()
Enjoy your new, modern LED Cluster
WARNING!!! THE CLUSTER HOLDS THE CAR MILEAGE. DO NOT PUT THE KEY INTO YOUR CAR WITHOUT THE CLUSTER INSTALLED AS YOU WILL GET A TAMPER DOT. IF YOU WISH TO TEST THE CLUSTER INSTALL IT AND TURN ON THE LIGHTS. DO NOT PUT THE KEY INTO THE IGNITION!!!
Before we start, take a picture of your cluster with the car off. You will need this to reposition the needles when we are finished.
Step 1: To remove the cluster you have to remove these too torque screws.

Remove these two connectors onto the back of the cluster. You do not have to remove the steering wheel.
Step 2: There are 4 torque screws behind the cluster. Remove these and pull off the back section
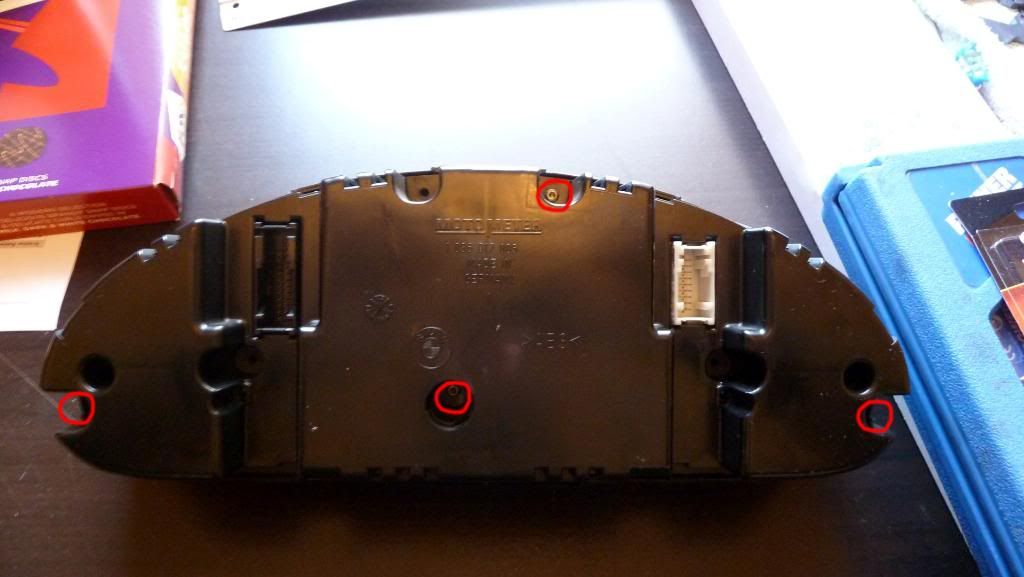
This is what the back of a petrol cluster looks like

Step 3: To remove the dials first you need to take off the clock and mileage buttons. Just take the rubber from the front of the cluster and pull off like below
Take the Dials out and this is what you get
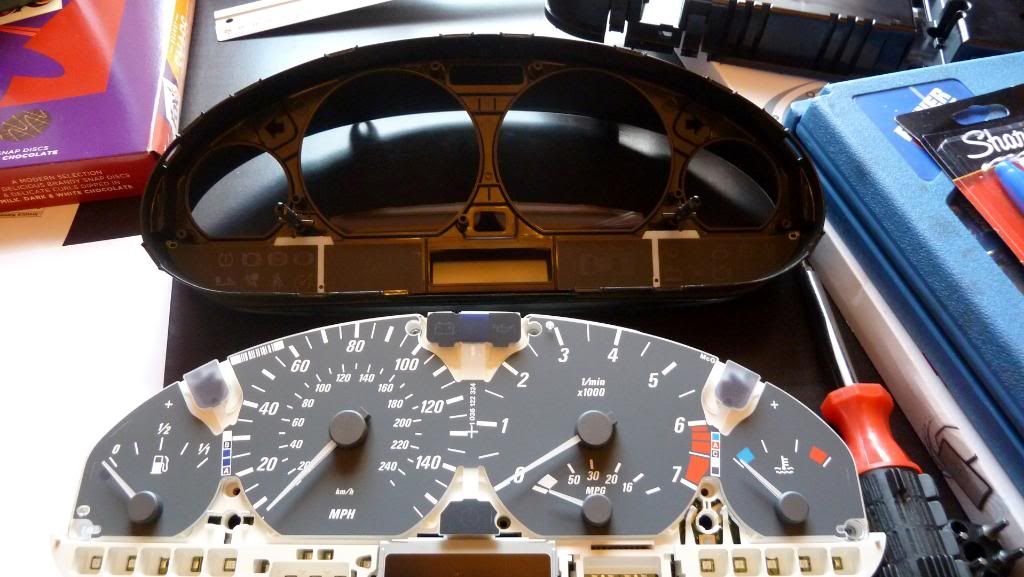
Step 4: I got a set of bright chrome ring, dark chrome rings and a real carbon fibre fascia from ebay.
First bend the carbon fibre into place, insert the two mileage and clock button so as the line up the carbon fibre, remove the rear sticker and put into place.
I used the darker chrome rings as they look much better with the carbon fibre
Step 5: This is the painful bit, removing the dials. It is VERY IMPORTANT to take your time here. PINCH the needless like in the picture below and TWIST AGAINST THE MOTOR while lightly pulling.
DO NOT TRY TO PRY THEM OFF LIKE THIS

If you can not get a needle off the best thing to do is the get a fork and slowly lift off the needle.
Step 6: I didnt like the needles been white. I tried to paint them red but you could clearly see the brush strokes. I then used nail polish to remove the paint but this also removed the white paint on the rear of the needle white is very very very important as this helps the light travel to the top of the needle. Also the nail polish made the needles go hazy so again the light would not travel to the top of the needle.
The best way to get the dials red is the use a Sharpie marker as it puts a strong but light coat over the surface.
I also dislike the grey centres so I taped up the needle and sprayed the grey a Satin Black.
Before:
Taped up for painting:
After:
Step 7: Take the dials apart is very easy. The layers you see below simply lift off. However the GLASS display is clipped into the board from behind so carefully remove
Step 8: Which LED's to replace. I have circles in red the LED's I replaced. I got from ebay some ultra bright white LED's. They were 50c each but look good quality.
I used this white the replace the Amber LED's that were beside the dials.
The line of 10 or so LED's at the bottom I replaced with red. These are used to light up the LCD display.
Below is a picture of the new white LED's (which have a yellow face) on the left and the standard Amber LED's on the right.
I put the board back into the car and turned on the lights to see if the LED's were all working. As you can see 2 LED's on the revv dial are not working. This is because I installed them the wrong way round.
LED's have a positive and negative. This is defined by a triangle(Positive) at the corner of the LED. Before you removed the old LED's, use a marker to indicate where the positive on the cluster board.
I also replaced the LCD LED's. The picture below has the red LED's on the right and older amber on the left.
I liked the red LED's so much better so replaced the remaining 5.
Step 9: To put the cluster back together it is the reverse. A few things you will need to keep in mind are:
1-Do not push the needles on too hard. If you do the motor will not move them. So you will be driving 155mph down the road but your cluster will say 0
But dont have them too loose as the light will bleed out and look bad.2-Remember we took a picture of the cluster at the start? Take it out and twist the needles into place so you can feel the motor push (ie if the revv needle is meant to be at 0 then twist it all the way clockwise to 6 O'clock, then go anti-clockwise till you feel pressure against the needle. Once the needle is at 0 STOP). It does not matter if the needle go a little clockwise as once you reconnect the cluster the needles will automatically go to the down position where you set them.
Here are a few before and after photos. You can make up your own mind but I think it is 200times better
Before:

After:
Enjoy your new, modern LED Cluster


